
Protecting your valuable data is essential, especially when it comes to your MacBook. With the help of Time Machine, you can easily set up remote backups to ensure that your files are safe and secure. In this article, we will explore various solutions for backing up your MacBook remotely using Time Machine.
Key Takeaways:
- Time Machine offers multiple options for remote backup on a MacBook
- You can use an external drive, network-attached storage (NAS) device, shared Mac, or AirPort base station as backup destinations
- Ensure your backup disk is formatted correctly for Time Machine to function properly
- Alternative cloud backup solutions, like Backup.Country, offer secure remote backup options
- Regularly backing up your important files is crucial for data protection
Using an External Drive on the Mac
Time Machine offers a convenient solution for backing up your MacBook using an external drive connected to a USB, Thunderbolt, or FireWire port on your Mac. By utilizing these ports, you can ensure a seamless backup process directly from your Mac, providing enhanced data protection and peace of mind.
If you connect an external drive to your Mac that is not using the correct format for Time Machine, the software will prompt you to erase the disk and reformat it. This ensures compatibility and allows Time Machine to effectively backup your files without any issues.
By utilizing an external drive, you can take advantage of the following benefits:
- Convenient and direct backup process from your Mac
- Expandable storage options for larger backups
- Flexibility to choose the drive that best suits your needs (USB, Thunderbolt, or FireWire)
We understand the importance of keeping your valuable data safe and secure. By using an external drive with Time Machine, you can rest assured knowing that your files are regularly backed up and protected.
To give you a better understanding of the available external drive options, here is a comparison table:
| Drive Type | Advantages | Disadvantages |
|---|---|---|
| USB | Standard and widely compatible | Slower transfer speeds compared to Thunderbolt or FireWire |
| Thunderbolt | Fast transfer speeds | Higher cost compared to USB |
| FireWire | Compatible with older Mac models | Limited availability on newer Mac models |
Choose the Right External Drive for Your Needs
When selecting an external drive for Time Machine backups, it’s essential to consider factors such as storage capacity, connectivity options, and budget. Assess your requirements and choose the drive that best suits your needs, ensuring compatibility with your Mac’s ports and Time Machine’s format requirements.

Next, we will explore another remote backup option using a Network-Attached Storage (NAS) device, which provides a centralized storage solution for multiple devices on your network.
Using a Network-Attached Storage (NAS) Device
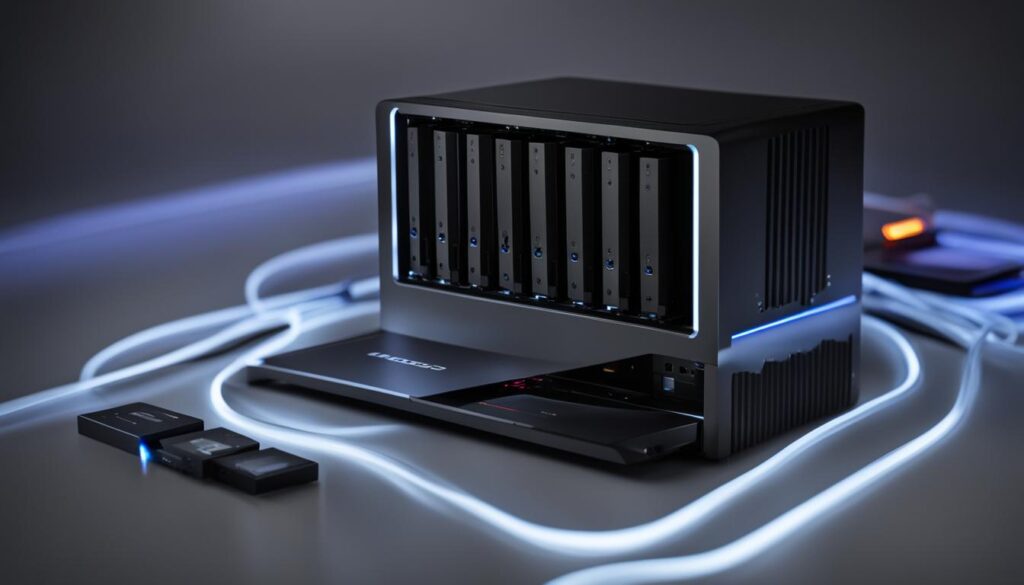
When it comes to remote backup solutions for your MacBook, using a network-attached storage (NAS) device can provide added convenience and data protection. Many third-party NAS devices support Time Machine over SMB, allowing you to securely store your backups on a separate network device.
To get started, it’s important to check the documentation for your specific NAS device for compatibility and setup instructions. Each device may have its own unique steps, so referring to the documentation ensures a smooth setup process.
By utilizing a NAS device for Time Machine backups, you can enjoy the benefits of centralizing your backup storage and accessing your backups from multiple devices on your network. This offers greater flexibility and peace of mind, knowing that your important data is safely stored in a separate location.
Table 3: Comparison of NAS Devices for Time Machine Backup
| NAS Device | Compatibility | Storage Capacity | Price |
|---|---|---|---|
| Brand A NAS | Compatible with Time Machine | 1TB, 2TB, 4TB, 8TB | $199, $299, $499, $799 |
| Brand B NAS | Compatible with Time Machine | 2TB, 4TB, 6TB, 12TB | $249, $399, $599, $899 |
| Brand C NAS | Compatible with Time Machine | 4TB, 8TB, 16TB, 32TB | $349, $549, $999, $1499 |
Note: Prices and storage capacities are subject to change and may vary for different models of the NAS devices.
Choosing the right NAS device for your needs will depend on factors such as compatibility, storage capacity requirements, and budget. It’s important to consider these factors when making a decision.
With a network-attached storage (NAS) device, you can enjoy the convenience of centralized backups and the added protection of having your data stored on a separate device. This ensures that even if your MacBook experiences a hardware failure or data loss, your important files remain safe and accessible.

Using a Shared Mac as a Backup Destination
Another option for Time Machine backups on a MacBook is to utilize a shared Mac on the network as a backup destination. This method provides a convenient way to store backups on another Mac computer, ensuring the safety and accessibility of your important files. To set up this configuration, follow these steps:
- Enable File Sharing on the Mac that will serve as the backup destination.
- Select a folder on the shared Mac where Time Machine backups will be stored.
- On the Mac you want to back up, open the Time Machine preferences.
- Select the shared folder on the shared Mac as the backup disk.
Once the setup is complete, Time Machine will start backing up your MacBook to the shared folder, providing an additional layer of protection to your data.
“Using a shared Mac as a backup destination allows you to leverage the resources of another computer on your network, ensuring redundancy and security for your Time Machine backups.”
By utilizing a shared Mac as a backup destination, you can take advantage of the storage capacity and capabilities of another computer in your network. This can be especially beneficial if the backup disk on the shared Mac has a larger capacity or if you want to centralize your backups in a specific location. Plus, the shared folder can be easily accessed by other Mac computers on the network, allowing for seamless data recovery and accessibility.
| Pros | Cons |
|---|---|
| Utilizes existing resources on the network. | Dependent on the availability of the shared Mac. |
| Allows for centralized backup storage. | May require additional setup and configuration. |
| Easily accessible by other Mac computers. | Relies on proper network connectivity and file sharing settings. |

As illustrated in the table above, using a shared Mac as a backup destination offers several advantages, along with a few considerations. It’s important to ensure that the shared Mac is always accessible and that the necessary network and file sharing settings are properly configured to facilitate smooth Time Machine backups.
Using an External Drive with an AirPort Base Station or Time Capsule
In addition to the previously mentioned options, Time Machine provides the flexibility to perform backups using an external USB drive connected to an AirPort Extreme Base Station or AirPort Time Capsule. This method allows for a seamless backup experience and offers the convenience of centralizing your backups in a single location. To ensure proper functionality, the external drive needs to be connected directly to the Mac and correctly formatted for Time Machine.

An alternative setup involves connecting the external USB drive to a USB port on the AirPort base station. By enabling the backup disk through the AirPort Utility, the drive becomes accessible for Time Machine backups. This setup streamlines the process and eliminates the need for a direct connection to the Mac.
This is particularly useful if you want to back up multiple Macs on your network to a shared external drive connected to the AirPort base station. By leveraging the AirPort Extreme Base Station or AirPort Time Capsule, you can create a centralized backup solution that caters to the needs of your entire network.
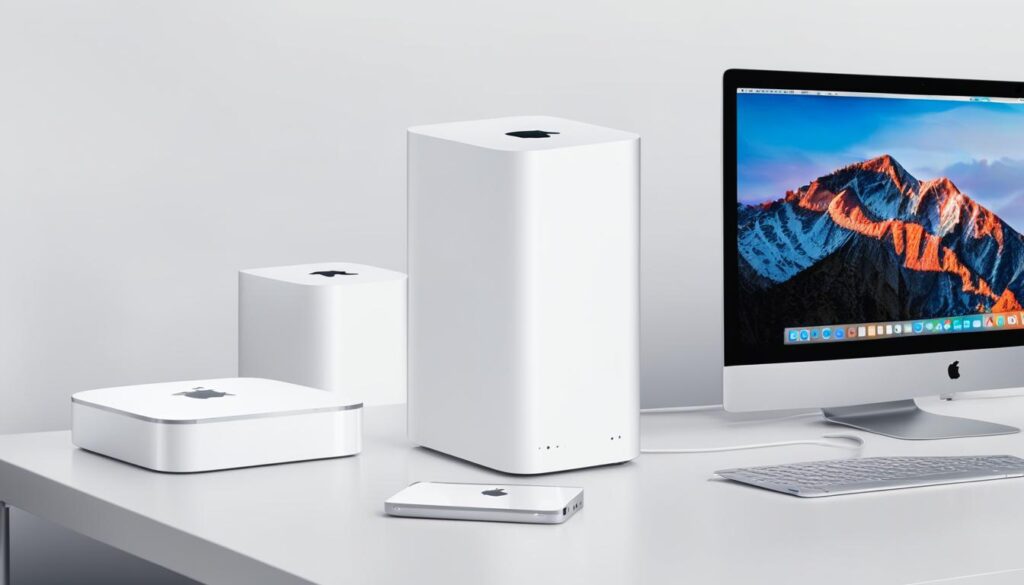
With the ability to utilize an external USB drive with AirPort devices, Time Machine provides a versatile backup solution that fits various setups and preferences. Whether you prefer a direct connection to the Mac or opt for the convenience of a shared drive connected to your AirPort base station, Time Machine ensures the safety of your valuable data.
Backing up to the Built-in Hard Disk of an AirPort Time Capsule
When it comes to remote backup solutions for your MacBook, Time Machine offers a range of options to suit your needs. One such option is backing up to the built-in hard disk of an AirPort Time Capsule. This feature provides the convenience of integrated backup storage, eliminating the need for an external drive.
With the AirPort Time Capsule, you can rely on its built-in hard disk to securely store your backup data. This network backup solution ensures that your valuable files and documents are protected and easily accessible whenever you need them.
The AirPort Time Capsule is designed to seamlessly integrate with your Mac, offering a smooth and efficient backup experience. By utilizing its built-in hard disk, you can enjoy the benefits of a dedicated storage solution exclusively for your backups.

Not only does this save you the hassle of connecting and managing an external drive, but it also ensures that your backup data remains safely stored on the AirPort Time Capsule, away from potential risks or damages that an external drive may encounter.
By leveraging the built-in hard disk of the AirPort Time Capsule, you can have peace of mind knowing that your data is protected through a reliable and secure network backup solution.

Benefits of Time Machine Backup
Time Machine offers comprehensive protection for your Mac files, ensuring the safety of your important data. Here are the key benefits of using Time Machine for backup:
Automated and Regular Backups
With Time Machine, your files are backed up automatically on a regular basis. This includes documents, photos, music, apps, and more. You can have peace of mind knowing that your data is continuously protected without having to manually initiate backups.
Hourly, Daily, and Weekly Backups
Time Machine provides flexibility in backup frequency, allowing you to choose the interval that suits your needs. It performs hourly backups for recent changes, daily backups to capture daily workflow progress, and weekly backups for long-term data protection.
Local Snapshots for Version History
One of the standout features of Time Machine is its ability to create local snapshots. These snapshots allow you to recover previous versions of files directly from your Mac, even if the backup disk is not connected. This feature ensures that you can retrieve older versions of documents or files in case you need to undo changes or recover lost data.
“Time Machine’s automated backups and local snapshots provide peace of mind, allowing you to focus on your work without worrying about data loss or accidental file changes.”

In addition, the local snapshots feature can be a lifesaver when you are traveling or away from your backup disk. You can access and restore files from Time Machine’s local snapshots, making it a reliable solution for confident data recovery.
To visually illustrate the benefits of Time Machine backup, here is a table summarizing its key advantages:
| Benefits | Description |
|---|---|
| Automated Backups | Time Machine performs regular backups without manual intervention. |
| Flexible Backup Frequency | You can choose the interval for backups – hourly, daily, or weekly. |
| Local Snapshots | Time Machine creates local snapshots for easy recovery of previous file versions. |
With Time Machine’s automated backups, flexible options, and local snapshots, you can embrace a worry-free approach to data protection and ensure that your important files are always safeguarded from unexpected events.
Setting Up Time Machine Backup
When it comes to safeguarding your valuable data on a MacBook, setting up Time Machine backup is a crucial step. With Time Machine, you can easily restore your files, recover previous versions, and ensure that your important data is protected. Here’s how you can set it up:
Step 1: Connect an External Hard Disk
To begin, connect an external hard disk to your Mac. Make sure the disk is compatible and has sufficient storage capacity to accommodate your backups. You can use an external hard drive with USB, Thunderbolt, or FireWire connectivity.
Step 2: Turning on the External Hard Disk
Once connected, turn on the external hard disk. Your Mac will recognize it and prompt you to choose whether you want to use it for Time Machine backups.
Step 3: Setting Up Time Machine Backup
Next, you have two options to set up Time Machine backup.
- From the Time Machine Dialog: After connecting and turning on the external hard disk, a Time Machine dialog will appear asking if you want to use it for backups. Click “Use as Backup Disk” to proceed. Time Machine will then format the disk for backups and start the backup process.
- Through Time Machine Settings: Alternatively, you can set up the external hard disk as the backup destination through Time Machine Settings. Go to the Apple menu, select “System Preferences,” and click on “Time Machine.” From there, click on “Select Disk” and choose the connected external hard disk as the backup disk.
Important Note:

It’s important to note that Time Machine does not back up system files or apps installed during macOS installation. However, it will back up all your personal data, including documents, photos, music, and other files.

Setting up Time Machine backup is an essential step to ensure the safety and security of your important data. By following these simple steps, you can have peace of mind knowing that your MacBook is backed up and protected against data loss.
Viewing Backup Status and Last Backup Date
Knowing the backup status and the last backup date of your Time Machine backups is essential for ensuring the safety of your data. With Time Machine’s user-friendly interface, you can easily access this information and stay informed about the status of your backups.
To view the backup status and the date of your last backup:
- Open the Time Machine interface on your Mac.
- Click on the Time Machine icon in the menu bar and select “Enter Time Machine.”
- Navigate to the desired folder or file you want to check the backup status for.
- At the bottom right corner of the Time Machine interface, you’ll find the status and the date of your last backup.
By regularly checking the backup status, you can ensure that your backups are occurring as scheduled and that your important files are being protected. This visibility allows you to take any necessary actions in case of any issues or interruptions in the backup process.
Here is an example of how the Time Machine interface displays the backup status and last backup date:
Monitor your backup status regularly
Monitoring your backup status is crucial for data protection and peace of mind. By verifying the last backup date, you can confirm that your files are up to date and safe from any potential data loss.
“Regularly checking the backup status ensures that your files are being protected and that you can restore them from a recent backup when needed.”
Example of backup status in the Time Machine interface:
| Backup Status | Last Backup Date |
|---|---|
| Backup Completed | July 15, 2022 at 4:30 PM |
Troubleshooting Remote Backup Issues
In case of any issues with remote backup using Time Machine, users may encounter common problems that can hinder the backup process. Some of these remote backup issues include connectivity problems and errors during backup initiation. Resolving these issues promptly is crucial to ensure the safety of valuable data. Here are some steps to troubleshoot common remote backup issues:
- Check network connectivity: Ensure that the Mac is connected to a stable network connection. Verify that the Wi-Fi or Ethernet connection is functioning properly.
- Verify backup disk availability: Ensure that the backup disk is connected and accessible to the Mac. Check if the drive is properly mounted and visible in the Finder.
- Restart the Mac: Restarting the Mac can help resolve temporary glitches that may be causing the remote backup issues.
- Update macOS and Time Machine: Ensure that the Mac is running the latest version of macOS and that Time Machine is up to date. Install any available updates to fix known bugs or issues.
- Reset Time Machine preferences: If the backup process is consistently failing, resetting the Time Machine preferences can help. Go to the Time Machine preferences in System Preferences and click on the “Options” button. Remove the backup disk and add it again to refresh the settings.
- Check available disk space: Verify that there is sufficient free space on the backup disk to accommodate the backups. If the disk is nearly full, delete older backups or consider using a larger backup disk.
- Check disk permissions: Use Disk Utility to verify and repair disk permissions on the backup disk. In some cases, incorrect permissions can cause issues with the backup process.
If the above steps do not resolve the remote backup issues, it is recommended to refer to the macOS documentation for additional troubleshooting steps. Alternatively, users can seek assistance from Apple support to diagnose and resolve the problem.
Remember that maintaining regular backups is essential for data protection and peace of mind. Troubleshooting remote backup issues promptly ensures that your valuable files remain safe and accessible.
Alternative Remote Backup Solutions
In addition to Time Machine, there are other remote backup solutions available that provide a reliable and secure option for backing up MacBook data remotely. One popular option is cloud backup services, such as Backup.Country. These cloud-based solutions offer SAAS-based backup, ensuring that your important files are protected and easily accessible whenever you need them.
Why Choose Cloud Backup?
Cloud backup services have become increasingly popular due to their numerous advantages. Here are a few reasons why you should consider using a cloud backup solution:
- Convenience: Cloud backup allows you to automatically and continuously back up your MacBook data without the need for manual intervention. This eliminates the risk of forgetting to back up important files and ensures that your data is always protected.
- Accessibility: With cloud backup, you can access your files from anywhere with an internet connection. This is especially useful when you need to retrieve a file while on the go or from a different device.
- Security: Cloud backup services offer encryption and advanced security measures to protect your data from unauthorized access. Your files are stored securely in data centers with redundant systems, ensuring that they are safe from physical damage or loss.
- Scalability: Cloud backup solutions provide the flexibility to increase storage capacity as your data grows. This eliminates the need to constantly upgrade hardware or invest in additional storage devices.
Comparing Cloud Backup Providers
When choosing a cloud backup provider, it’s essential to compare the features and pricing to find the best solution for your needs. Here is a comparison of some popular cloud backup providers:
| Cloud Backup Provider | Features | Pricing |
|---|---|---|
| Backup.Country | SAAS-based backup, unlimited storage, file versioning, user-friendly interface | Starting from $9.99/month |
| CloudBackup Pro | Automatic backups, file syncing, military-grade encryption | Starting from $5.99/month |
| SecureCloud Backup | End-to-end encryption, HIPAA-compliant, hybrid backup options | Contact for pricing |
“Cloud backup services offer a convenient and secure way to ensure the safety of your MacBook data. With features like unlimited storage, file versioning, and user-friendly interfaces, Backup.Country stands out as a reliable choice.” – Mac Backup Expert
Before making a decision, consider your specific backup requirements and evaluate the features, pricing, and reputation of different providers to find the best fit for your needs.
Conclusion
In today’s digital world, it is crucial to have a reliable remote backup solution for your MacBook. Time Machine provides seamless options for backup, including using an external drive, network-attached storage (NAS), shared Mac, or an AirPort base station. By regularly backing up your important files, you can ensure the safety and security of your data.
However, if you’re looking for an alternative to Time Machine, consider cloud backup services like Backup.Country. These SAAS-based backup solutions offer an additional layer of protection for your MacBook data, allowing you to store your backups securely in the cloud. With Backup.Country, you can have peace of mind knowing that your files are safe, even in the event of a hardware failure or loss.
Whether you choose to stick with Time Machine or explore cloud backup options, the key is to prioritize remote backup for your MacBook. Don’t wait until it’s too late to protect your valuable data. Safeguard your digital life by implementing a robust and reliable remote backup solution today. Trust us, the peace of mind is worth it.
FAQ
What are the options for remote backup using Time Machine on a MacBook?
Time Machine offers several options for remote backup on a MacBook, including using an external drive connected to the Mac, a network-attached storage (NAS) device, or a shared Mac as the backup destination. It also supports backing up to an external drive connected to an AirPort Extreme Base Station or AirPort Time Capsule.
How can I use an external drive on the Mac for Time Machine backup?
To use an external drive on the Mac for Time Machine backup, connect the drive to a USB, Thunderbolt, or FireWire port on the Mac. Time Machine will prompt for erasing the disk if it is not using the correct format. This method allows for a straightforward backup process from the Mac itself.
Can I use a NAS device for Time Machine backup?
Yes, many third-party NAS devices support Time Machine over SMB. To use a NAS device for Time Machine backup, check the device’s documentation for compatibility and setup instructions. Using a NAS device offers the advantage of storing backups on a separate network device, providing additional data protection.
How can I use a shared Mac as a backup destination?
To use a shared Mac as a backup destination for Time Machine, enable File Sharing on the Mac and select a folder to use for Time Machine backups. Once set up, the shared folder can be selected as a backup disk on other Mac computers.
How can I use an external drive with an AirPort Base Station or Time Capsule for Time Machine backup?
To use an external USB drive with an AirPort Base Station or Time Capsule for Time Machine backup, connect the drive directly to the Mac and format it correctly. Alternatively, connect the drive to a USB port on the AirPort base station and enable the backup disk through the AirPort Utility.
Can I back up to the built-in hard disk of an AirPort Time Capsule?
Yes, Time Machine supports backing up to the built-in hard disk of an AirPort Time Capsule on the network. This provides the convenience of having the backup storage integrated into the Time Capsule device, eliminating the need for an external drive.
What are the benefits of using Time Machine backup?
Time Machine offers automated, regular backups of files on a Mac, including apps, music, photos, and documents. It performs hourly, daily, and weekly backups, ensuring that data is always protected. Time Machine also creates local snapshots, allowing users to recover previous versions of files, even if the backup disk is not connected.
How do I set up Time Machine backup?
To set up Time Machine backup, connect an external hard disk to the Mac and turn it on. Users can choose to set up the disk from the Time Machine dialog or through Time Machine Settings. It is important to note that Time Machine does not back up system files or apps installed during macOS installation.
How can I view the backup status and last backup date?
Users can easily view the backup status and last backup date through the Time Machine interface. This provides visibility into the backup process and ensures that backups are occurring as scheduled.
What should I do if I encounter issues with remote backup using Time Machine?
In case of any issues with remote backup using Time Machine, users can check for solutions in the macOS documentation or seek assistance from Apple support. Common issues may include connectivity problems or errors during backup initiation.
Are there alternative remote backup solutions available?
Yes, there are alternative remote backup solutions available. Cloud backup services, such as Backup.Country, offer SAAS-based backup solutions, providing a reliable and secure option for backing up MacBook data remotely.
Can you provide a remote backup solution for my MacBook?
We recommend considering Time Machine as a remote backup solution for your MacBook. It offers various options for backing up your data, including external drives, NAS devices, shared Macs, and AirPort Base Stations or Time Capsules. Additionally, alternative cloud backup services like Backup.Country can provide extra peace of mind.
